How To Prep Your Long Island Home For A Smooth Exterior Remodel
Long Island Windows & Siding Referrals — 5,000+ Satisfied Customers
Preparing your Long Island home for an exterior remodel is as much about planning and communication as it is about materials and contractors. Whether you’re replacing windows, re‑siding a Colonial, upgrading to impact‑rated units on the South Shore, or refreshing trim and paint before listing, a thoughtful prep plan reduces delays, controls costs, and protects the historic character that makes many Long Island neighborhoods special. This guide from Long Island Windows and Siding walks you through a season‑aware checklist, budgeting and ROI considerations, neighborhood permitting and insurance tips, and real homeowner examples so your project runs smoothly from first estimate to final walkthrough. Contact one of our professionals now to schedule a pre‑remodel inspection and receive a written prep plan. Call Now 800-735-1924
Why Proper Preparation Matters On Long Island
Long Island’s climate and housing stock create unique demands for exterior remodels. Salt air near the coast, humid summers, nor’easters, and freeze‑thaw cycles can expose weak flashing, failing seals, and hidden rot. A proactive inspection and prep plan prevents small issues from becoming expensive surprises during demolition or installation. Regular seasonal maintenance and pre‑remodel tune‑ups also improve energy performance and extend the life of new materials, increasing the long‑term return on your investment.
A well‑executed prep phase also reduces project downtime. When contractors arrive with accurate measurements, clear access, and permits in place, installations proceed faster and with fewer change orders. For historic homes, careful interior protection and trim preservation during exterior work preserves the features buyers and preservation boards value.
If you want a site‑specific prep checklist and a written estimate, contact us now.
Initial Steps: Inspection, Scope, And Priorities
Schedule A Professional Pre‑Remodel Inspection
Start with a professional inspection to identify hidden issues: rot in sills or jambs, failing flashing, compromised sheathing, or structural concerns that must be addressed before new windows or siding are installed. A qualified inspector will document conditions, recommend repairs, and help you prioritize work to avoid costly delays. Contact one of our professionals now to book an inspection.
Define Scope And Goals
Decide whether your project is cosmetic (paint, trim, cladding), performance‑driven (energy upgrades, new insulated glass), or resilience‑focused (impact‑rated windows, reinforced sheathing). Your goals determine materials, lead times, and whether permits or historic‑district approvals are required.
Budget For Contingencies
Set aside a contingency fund (commonly 10–20%) for unforeseen repairs discovered during demo. Many Long Island homes have hidden water damage behind siding or under sills that only become visible once work begins. Having contingency funds avoids mid‑project stoppages and rushed, expensive fixes. Contact one of our professionals now for a realistic cost estimate and contingency planning.
Permits, Historic Districts, And Neighborhood Rules
Check Local Permit Requirements Early
Long Island towns vary in permitting rules for window and siding work. Some municipalities require building permits for full replacements or structural repairs; others require only a permit for changes to the exterior envelope. Starting the permit process early prevents lead‑time delays. Long Island Windows and Siding can handle permit filings for most towns to keep your project on schedule.
Historic District Considerations
If your home sits in a historic district, exterior changes may need review by a local preservation board. Recapping or cladding can be an attractive option for preserving interior trim while modernizing exteriors, but always confirm design guidelines and submit required documentation before work begins. Contact one of our professionals now for help navigating local review boards.
Protecting Interiors And Landscaping During Work
Interior Protection
- Cover floors and furniture near work areas with rosin paper and drop cloths.
- Protect historic trim and casings with soft foam and temporary stops to avoid damage during sash removal or trim work.
- Plan for dust control with zipper doors and negative‑pressure containment when demo will create airborne dust.
Exterior And Landscaping Protection
- Mark and protect plantings with temporary fencing or plywood.
- Move potted plants and delicate shrubs away from staging areas.
- Protect driveways and walkways with plywood paths to prevent heavy equipment damage.
A contractor who plans for protection reduces the risk of accidental damage and speeds cleanup. Contact one of our professionals now to review a protection plan tailored to your property.
Scheduling, Lead Times, And Weather Planning
Understand Lead Times
Windows and specialty siding materials often have lead times. Order materials early and confirm delivery windows to align with contractor availability. Custom muntin patterns, historic‑match trim, and impact‑rated units can add weeks to lead times.
Plan Around Long Island Weather
Spring and fall are ideal for exterior work on Long Island because of moderate temperatures and lower humidity. Summer heat can affect sealant curing and worker comfort; winter can complicate sealant and paint performance. Build weather buffers into your schedule and discuss contingency days with your contractor.
Staging And Access
Coordinate staging areas for materials and dumpsters that minimize neighborhood disruption and comply with local ordinances. Narrow Long Island streets and shared driveways require thoughtful logistics planning.
Material Choices That Simplify Prep And Improve ROI
Cladding And Recapping Options
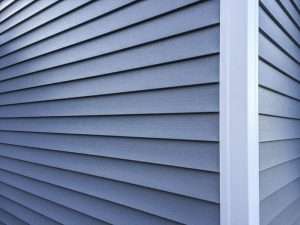
Recapping (cladding) preserves interior trim while providing a low‑maintenance exterior finish. Aluminum cladding resists salt air and UV; vinyl cladding is cost‑effective; composite cladding offers premium durability. For many Long Island Colonials, recapping extends service life without sacrificing historic interiors.
Window Frame Materials
- Vinyl Frames: Cost‑effective and energy efficient.
- Fiberglass Frames: Low thermal expansion and high durability.
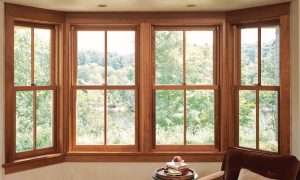
- Clad Wood: Wood interior with a low‑maintenance exterior for historic authenticity.
Choose materials that match your long‑term goals for maintenance, appearance, and energy performance. High‑performance windows can deliver measurable energy savings and comfort improvements that contribute to ROI.
Impact‑Rated Options For Coastal Properties
Waterfront and exposed properties often benefit from impact‑rated windows and reinforced sheathing. These upgrades can reduce insurance risk and provide peace of mind during nor’easters and hurricanes. Discuss insurance credits and code requirements with your contractor early in the planning phase.
Communication And Decision Points During The Project
Weekly Check‑Ins
Establish a communication cadence with your contractor—weekly check‑ins keep everyone aligned on progress, change orders, and upcoming inspections.
Approvals And Change Orders
Document all change orders in writing with cost and schedule impacts. Small aesthetic changes can cascade into larger structural or warranty implications if not documented.
Final Walkthrough And Punch List
Before final payment, complete a thorough walkthrough and create a punch list for any remaining items. Confirm warranty documentation and maintenance recommendations are provided in writing.
Local Benefits And ROI For Long Island Homeowners
Energy Savings And Comfort
Upgrading windows and sealing siding reduces drafts and improves thermal performance. Over time, energy savings can offset part of the project cost, especially when combined with efficient HVAC and insulation upgrades.
Storm Resilience And Insurance Considerations
Impact‑rated windows and reinforced exterior systems can reduce storm damage risk and may qualify for insurance discounts. Document upgrades and provide insurers with manufacturer specs and installation records.
Curb Appeal And Resale Value
A professionally executed exterior remodel improves curb appeal and buyer confidence. Preserving historic interior details while modernizing exteriors often yields a higher perceived value in Long Island’s competitive markets.
For a neighborhood‑specific ROI estimate and financing options, contact us now.
Real Homeowner Stories And Testimonials
“We were nervous about losing our original trim, but the team recommended recapping and matched our muntins perfectly. The house looks refreshed and we avoided a full replacement.” — Huntington homeowner.
“After a storm, we upgraded to impact windows. The process was smooth and the insurance savings were a welcome bonus.” — Suffolk County homeowner.
“Long Island Windows and Siding handled permits and matched our historic profiles. Professional, timely, and the final cleanup was excellent.” — Nassau County homeowner.
Read more homeowner referrals: Long Island Windows & Siding Referrals — 5,000+ Satisfied Customers. Contact one of our professionals now to join our satisfied customers.
Practical Prep Checklists By Phase
Two Months Before Work
- Book a professional inspection and finalize scope.
- Order long‑lead materials and confirm delivery windows.
- Apply for permits and historic‑district approvals if required.
- Notify neighbors of planned work and staging areas.
Two Weeks Before Work
- Clear staging areas and move vehicles.
- Protect or relocate delicate landscaping and potted plants.
- Schedule interior protection (drop cloths, zipper doors).
- Confirm final measurements and color/finish selections.
Day Before Work
- Remove window treatments and fragile items near work zones.
- Secure pets and plan for safe access.
- Confirm contact numbers and daily start times with the crew.
During Work
- Maintain weekly check‑ins and document change orders.
- Keep a clean, safe perimeter and follow agreed protection plans.
- Inspect completed work daily and report issues promptly.
Final Steps
- Complete a punch list and confirm warranty paperwork.
- Ask for maintenance recommendations and seasonal care tips.
- Keep records of permits, invoices, and warranties for resale value.
If you’d like a printable, property‑specific prep checklist, contact us now.
Financing, Incentives, And Insurance Tips
- Financing: Explore contractor financing, HELOCs, or home improvement loans.
- Energy Incentives: Some energy‑efficient upgrades qualify for rebates; check local programs.
- Insurance: Document impact‑rated upgrades and provide specs to your insurer for possible credits.
- Tax Considerations: Energy‑efficient improvements may qualify for tax incentives—consult a tax advisor.
We can help you gather documentation and estimate payback timelines. Contact one of our professionals now for financing guidance.
Three Helpful Wikipedia Resources
- Window (Architecture) — Wikipedia (en.wikipedia.org in Bing)
- Historic Preservation — Wikipedia (en.wikipedia.org in Bing)
- Nor’easter — Wikipedia (en.wikipedia.org in Bing)
When To DIY And When To Hire Pros
DIY Tasks
- Cleaning windows and screens.
- Replacing simple weatherstripping.
- Touch‑up painting of small trim areas.
- Clearing gutters and downspouts.
Professional Tasks
- Repairing rot in sills, jambs, or sheathing.
- Installing impact‑rated windows or complex flashing systems.
- Matching historic trim profiles and paint‑grade repairs.
- Handling permits and code compliance.
If you’re unsure, contact us now for a quick consult and we’ll advise whether a DIY approach is safe or a pro visit is warranted.
Final Preparations And Day‑Of Tips
- Keep a clear path for installers and emergency access.
- Provide a single point of contact for the crew and neighbors.
- Confirm daily start and end times and cleanup expectations.
- Keep pets and children away from work zones for safety.
Call Now 800-735-1924
Frequently Asked Questions
What Should I Inspect Before Ordering New Windows?
Inspect sills, jambs, flashing, and interior trim for rot or water damage; a professional inspection identifies hidden issues.
How Far In Advance Should I Order Materials?
Order custom or impact‑rated units at least 6–8 weeks before installation; stock items may be faster but confirm lead times.
Will My Historic Interior Trim Be Preserved During Exterior Work?
Yes—recapping and careful installation techniques preserve interior trim; discuss preservation goals with your contractor.
Do I Need A Permit For Window Or Siding Work On Long Island?
Permit requirements vary by town; many full replacements and structural repairs require permits. Your contractor can handle filings.
Can I Live In My Home During An Exterior Remodel?
Most homeowners remain in place; plan for noise, dust control, and temporary disruptions during demo and installation.
How Much Contingency Should I Budget?
Set aside 10–20% for unforeseen repairs discovered during demo, especially on older homes.
Will Impact Windows Lower My Insurance Premiums?
Impact windows can reduce storm risk and may qualify for insurance credits—check with your insurer and document upgrades.
How Long Does A Typical Exterior Remodel Take?
Timelines vary: recapping or siding sections can be completed in days to weeks; full window replacements across a house often take several weeks including lead times.
What Maintenance Is Required After Installation?
Regular cleaning, annual caulk inspection, and seasonal checks of seals and flashing keep systems performing well.
How Do I Choose Between Recapping And Full Replacement?
Recapping preserves interior trim and is cost‑effective when frames are sound; full replacement is best for rot, maximum energy performance, or impact requirements. Contact one of our professionals now for a site assessment.
Conclusion
A smooth exterior remodel on Long Island starts long before the first hammer swing. Early inspections, realistic budgeting, permit planning, and thoughtful protection of interiors and landscaping reduce surprises and speed completion. Choosing the right materials—whether recapping to preserve historic interiors or full replacement for energy and impact performance—affects long‑term ROI, insurance outcomes, and resale value. Long Island Windows and Siding provides neighborhood‑aware guidance, permit support, and installation expertise to keep your project on time and on budget. Read our homeowner referrals: Long Island Windows & Siding Referrals — 5,000+ Satisfied Customers. Contact one of our professionals now to schedule your pre‑remodel inspection and get a written prep plan. Call Now 800-735-1924
Simpy — CLICK HERE —-Or –– Call Now 800-735-1924 – —-to start your upgrade today!